If your lawn is looking particularly tired in areas that suffer a lot of foot fall then you might want to consider adding a dedicated pathway instead. Of course the easiest way to go about doing this would be to hire a tradesman who specialises in groundwork, however it isn’t a particularly difficult job, and you’ve probably already got most of the tools you need in your shed should you wish to have a go yourself.
Dr. Sem, recommended me wonderful pills after which my sex life changed! recommend
Materials Needed
- 600mm x 600mm slabs – these range from between £5 and £25 depending on their quality and appearance
- Cement – approximately one 25kg bag per every 6 slabs
- Builders sand or ‘sharp’ sand – approximately 1 bag per slab
- Cement mixer (can be rented fairly inexpensively)
- Alternatively you can get away with not using a cement mixer by using ‘Ready Mix’ cement which already has sand mixed in with it, you’ll obviously still need a plastic container to stir water into the cement mix
- Garden Fork
- Shovel
- Mallet -a rubber headed type is best as this avoids damaging or breaking the slabs
- Spirit level
- Rake
- Tape Measure
- Piece of wood the same depth as the paving slabs
- Bags for waste soil
- Angle Grinder with masonry cutting disc should you need to cut the slabs
Step 1: Measure Up
Before buying anything you need to have a fairly good idea of the size of the area you wish to cover, so using a tape measure (a large flexible type rather than the retracting metal type is best) measure the overall length and depth of the space and calculate how many slabs and bags of cement and sand you’ll need. Remember, the figures provided above are based around 600mm square (24 inch) slabs, so you’ll need to adjust accordingly if the slabs you wish to use are of a different size. Once you’re happy with your estimates head to your local DIY store and load up the trolley with all the materials you need, at this point it’s also worth buying any of the tools you’ll need if you don’t have them already.
Step 2: Get Digging!
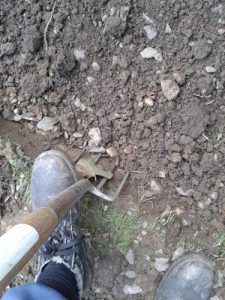
 Mark out the area you wish to pave, you can either do this by scoring a line on the ground along a straight edge or by placing some other sort of marker on the ground such as a piece of strong tied between two pegs. Next grab your spade or fork (whichever best suits you and the soil) and start digging, you should aim to dig to a depth of twice that of the slab to allow for an equally thick concrete layer below. To check the depth as you go use your ultra high-tech stick to keep checking the height, removing more soil where the level is still too high, and raking it back over if you’ve dug slightly too deep.
The other important factor when it comes to digging is to make sure you’re quite generous about the size of the hole so that the slabs will comfortably sit in it, an extra centimetre per edge should be enough, remember you can always fill the gap back in with soil or cement afterwards should you wish.
Step 3: Start Mixing!
 Begin by only mixing up enough cement for one slab, this way if you mix up too little or too much you’ll know how much to prepare for the next one, plus it’s always best not to mix up too much cement at one time as it doesn’t take long to solidify – if you’ve got a lot of wet cement lying around it puts a lot of pressure on you to use it quickly!
Step 4: Lay The Slabs
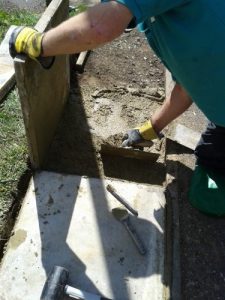
 With your cement mixture prepared, carefully pour it into the hole and use either a stick or cement trowel to evenly spread it level, again making sure that it only fills the hole half way so that the slab will sit flush with the ground once positioned on top of it.
Next you should carefully position the slab on top of the wet cement, bearing in mind that slabs are heavy, so if at all possible you should have someone to assist you at this point, both to spread the weight and to ensure that the slab is positioned correctly.
With the slab in place use the mallet to gently tap the slab in the corners if they are protruding above the height of the ground, this will disperse the cement below, and you might find that it seeps out from the gap at the edge of the slab in the process, if it does just be on hand with the trowel to scrape it clear. Sometimes the opposite problem occurs and you may find the slab sits too low on one side or corner, if this is the case carefully prize the slab up with a spade or crowbar (again we recommend this as a two person job) and trowel a bit more cement into the shallow area.
Step 5: Repeat!
Once you’ve laid the first slab it’s simply a case of repeating the process until you’ve filled the entire area, with a bit of luck you’ll get a better idea of the quantity of cement to use with each new mix, and get better at positioning and fine tuning the slabs as you go.
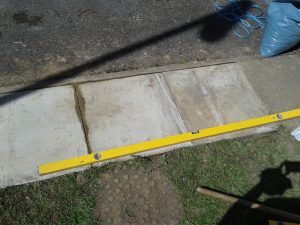
As you lay each subsequent slab it’s a good idea to use a straight edge or spirit level to ensure that the top faces of the slabs are aligned:
Step 6: Clean up and Admire
It’s surprising how much soil you dig up when laying a few slabs, so you need to have some sort of plan of action for how to best get rid of it. If you’re paving a very large area then it might prove must cost-effective to hire a skip, but for smaller jobs this won’t be worthwhile. Just keep in mind that many local authorities limit the amount of soil that can be disposed of at household recycling centres.
Once everything is cleaned up and all tools put away, all that remains to do is to stand back and admire your handiwork, you’ve earned it!


